Savory & Sweet.
>> Tuesday, August 16, 2011
Summer is winding down and I am finding so much to do and make in these last few weeks...and loving it! I have so much energy and motivation to create and organize! This week, besides organizing gift wrap bags and utensil drawers, I decided to spend a week in the kitchen with none other than Rachel Ray...and by Rachel Ray I mean her magazine that my dear, sweet friend Lauren gifted me for an entire year! I'd have to say my favorite thing about it is the amount of time spent prepping and cooking. It's hardly hours slaving over the stove, yet produces delicious and aesthetically pleasing dishes! See for yourself!
Tonight's Dinner:
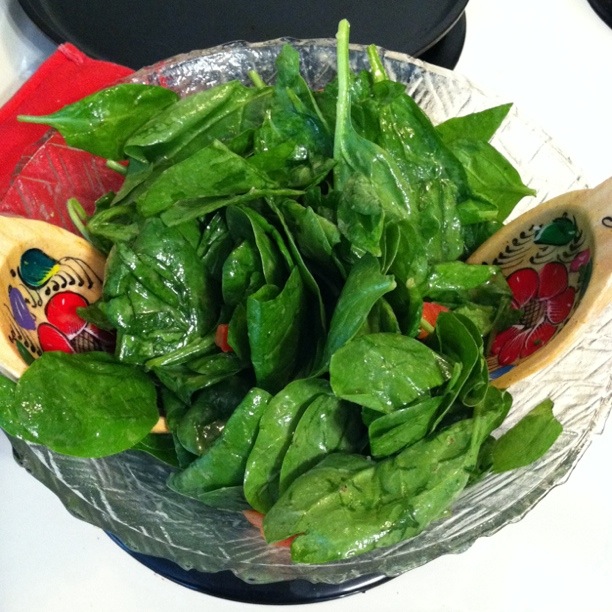
Sausage Rolls with Baby Spinach & Red Pepper Salad
Both of these came from the RR weekly meal planner insert found in her monthly magazine. Super easy! About 30-40 minutes of prepping stuff/making the salad and about 25 minutes for the sausage rolls to bake.
Here you'll find the ingredients and directions. http://www.rachaelraymag.com/recipes/rachael-ray-magazine-recipe-search/dinner-recipes/sausage-rolls-with-spinach-salad
Some tips that I discovered along the way:
For step 1 I found it easier to use some good ol' fashioned elbow grease and mix the sausage, breadcrumbs, and red pepper with my hand. "Stirring" it was not going to get the job done. This was much more affective in getting the breadcrumbs mixed in since the sausage is so moist and they are so dry.
For step 2, use the parchment paper to help you wrap the sausage. It comes off of the paper easily, but while it's still on it, it helps to bring up the sides.

For the steps involving rolling things out to a certain length, I used my parchment paper or foil as a marker. If you look on the box it will tell you how long the paper/foil is. My foil was 12" so I used that as a gauge when I rolled out my 11" sausage logs before sticking them in the fridge. Most people probably just eyeball it but when I cook I transform into a type A monster since I'm really more comfortable baking, due to its exact science-ness :)

For step 3, my oven cooked it to a beautiful golden brown in 25 minutes so you might want to check on it before the full 30 are up. Seeing how it turned out in the "looks" department, I might also brush some egg on the rest of it next time and not just the top, so as to give the entire roll that golden brown, crispy look (which you can see here on the top).

For step 4, if you use the same tablespoon for the mustard as you used for the olive oil, the mustard will literally just slide right out of the tablespoon if you don't wash it first. I was quite excited about this because I hate digging creamy condiments out of measuring spoons. Finally, for this step, I added the peppers first, coated them very well, and added the spinach last. I spent a good amount of time making sure the baby spinach was coated in the dressing (which was yummy by the way!). If you are not a fan of tart dressings, ease off on the lemon. You'd be surprised how much lemon juice comes out of just 1/2 lemon!

This, of course, would not be complete without some sort of sweet yumminess to top off the evening. At my husband's request I baked some banana walnut muffins. I decided to stick with Rachel since I am loving her magazine and found a neat recipe on her website. http://www.rachaelraymag.com/Recipes/rachael-ray-magazine-recipe-search/dessert-recipes/banana-walnut-muffins
 |
| Dry ingredients to mix |

For step 3 I decided to use some of my yummy bananas I've been saving in the freezer for just a baking occasion such as this. They defrost nicely in the microwave for somewhere around a minute or less. I also love this Pampered Chef utensil for mashing things. It's called a Mix n Chop. I use it for everything from ground beef to mashed potatoes to mashing bananas. Works great!...as you can see :) For the yogurt it was near impossible to find a small container of whole milk plain yogurt at the store so I decided to go with a plain greek yogurt after reading some reviews on the RR page under this recipe. So glad I did! It gives the flavor a neat, but subtle twist!
After mixing the wet ingredients with the dry ingredients I got something like this:


It says to fill the muffin liners to the top . I love to use this scoop! It works for thicker or thinner batters. I've used it for fruit, baking, you name it. I hate getting batter on my muffin trays or liners (Type A monster...) so I use this scoop so there's no dripping and it's more precise. They also have a measurement (I think this one is 2 tablespoons) which can come in handy.
And one of my favorite parts was the sugar and cinnamon mix to sprinkle on top. Another Pampered Chef product (I used to sell it) that makes my life so easy! I used more after they came out of the oven - mostly for taste :) but also to give them that glittery, sugary look like the ones in the bakeries!


And the final product....yes, one is missing. Well I had to sample it before I could let anyone else eat them :)
Guten Appetit!
Read more...